
We look at some essential keyboard shortcuts for After Effects. If you’ve animated anything in After Effects, then you’ll know how much time can be wasted navigating the many buttons, menus, and windows on display.
So that’s why it’s handy to know the various different After Effects keyboard shortcuts. Quickly navigate your timeline like a pro. 💪
General After Effects Keyboard Shortcuts
Firstly, you will probably recognize some of these After Effects keyboard shortcuts, as they are universal across most programs.
The collection of menus and sub-menus can be difficult to navigate, so memorizing these shortcuts can save you tons of time.
| Mac | PC | Command |
|---|---|---|
| Cmd + C | Ctrl + C | Copy |
| Cmd + V | Ctrl + V | Paste |
| Cmd + Z | Ctrl + Z | Undo |
| Cmd + S | Ctrl + S | Save |
| Cmd + N | Ctrl + N | New Composition |
| Cmd + K | Ctrl + K | Composition Settings |
| Cmd + I | Ctrl + I | Import |
| Cmd + Y | Ctrl + Y | New Solid |
| Shift + Cmd + Y | Shift + Ctrl + Y | Solid Settings |
Property Shortcuts

Learning the layer property shortcuts is a must if you’re working with a lot of keyframes. With a single-letter key, you can quickly scroll through the property options for each asset. These are the same for both Mac and PC.
| Mac + PC | Property |
|---|---|
| A | Anchor Point |
| TT | Opacity |
| P | Position |
| S | Scale |
| R | Rotation |
| U | All keyframes |
Tool Shortcuts

Let’s face it, the toolbar in After Effects is challenging to use with small icons and even smaller drop-down menus.
Learn the tool after effects keyboard shortcut and save yourself the time and frustration of dragging your cursor to the top of the screen and clicking the wrong icon.
| Mac | PC | Tool |
|---|---|---|
| V | V | Arrow (Selection) |
| H | H | Hand |
| Q | Q | Shape |
| G | G | Pen |
| Y | Y | Pan Behind |
| Cmnd + T | Ctrl + T | Type |
| Cmnd + B | Ctrl + B | Brush Tool/Clone Stamp Tool/Eraser |
Masks

Working with masks is where After Effects keyboard shortcuts pay dividends by helping you speed things up. These keys can save you serious time from clicking through three drop-down menus to reach the desired options.
| Mac + PC | Command |
|---|---|
| MM | All Mask Settings |
| M | Mask Path |
| F | Mask Feather |
| TT | Mask Opacity |
Workspace Shortcut

It’s a good idea to work with comp lengths longer than the piece you are planning to make, but this can slow down your render and playback times. Setting the beginning and end of your workspace can help with this issue.
Line up your playhead on the timeline where you want your workspace to be, press B to create your in point and N to create your outpoint. This is the same for both Mac and PC.
Fit To Comp Shortcut

No matter what you are doing in After Effects, it is likely that you will be zooming in and out of the viewer window to get a closer look at your work.
Clicking the tiny menu to ‘Fit’ your comp to the viewer can be a pain. Instead, press Shift + / to make your comp fit your viewer. This is the same for both Mac and PC.
Panel Fullscreen

We’ve all done it.. pressed a button by mistake and ended up in full-screen mode of one panel.
The truth is, this can be one of the most helpful After Effects keyboard shortcuts when working with compositions containing a lot of layers, but if you do it accidentally it can be a bit of a shock.
Select the panel and press ~ to enter and exit full screen on that panel. This is the same for both Mac and PC.
Save Current Frame Shortcut
Occasionally you might need to export a single frame of your video. There are several ways to do this, but by far the quickest is with this shortcut.
Just align your playhead with the frame you wish to export and use Cmd + Opt + S (Mac) or Ctrl + Opt + S (PC).

Precomp Layer Shortcut
Pre-composing your layers is essential for an efficient workflow. If you don’t use pre-comps in your work, it is a good idea to get familiar with how and when to use them.
Not only is this key for specific animation styles, but it’s a great way of keeping your projects organized.
Pre-comping needn’t be a hassle: select the layers you wish to pre-comp and use Cmd + Shift + C (Mac) or Ctrl + Shift + C (PC) to bring up the pre-comp settings window.

Grid Shortcut
Finally, grids are super helpful when it comes to arranging your content. However, they make it difficult to view your work through the numerous lines across the screen.
But don’t worry as you can toggle grids on and off by using the shortcut Cmd + ‘ (Mac) or Ctrl + ‘ (PC). 👌

In short, there are hundreds of After Effects keyboard shortcuts, so it’s unlikely you’ll remember all of them. Try to learn a few of the ones which you use the most.
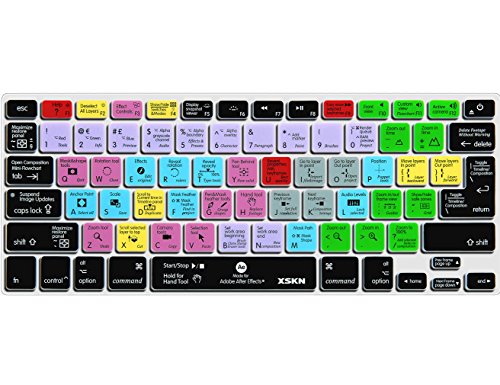
Also, if you still find yourself struggling then you can buy After Effects keyboard covers that have colored labels. 😉
Make sure you check out our article on the best plugins for After Effects, they can really save you time!