This first tutorial will walk you through the very beginning of the editing process — how to import and organize your footage in Premiere Pro.
When you first start using Premiere Pro, it can feel a bit overwhelming. There’s a lot to learn and explore, but don’t worry — we’re here to guide you through it. This new tutorial series is designed to help you get comfortable with Premiere Pro step by step.
You’ve probably heard the saying, “Failing to prepare is preparing to fail.” That couldn’t be more true when starting a new project in Premiere Pro.
Before you begin cutting clips and building your timeline, make sure to organize your footage first. A clean workflow saves you time later and keeps your project running smoothly. This process works the same on both Mac and Windows.
Organizing Your Footage
Before importing footage into Premiere Pro, it’s best to organize your files in one main project folder.
Keep everything — footage, music, graphics, and sound — together in that single folder. This makes it easier to manage your media and helps Premiere Pro keep track of all your assets.
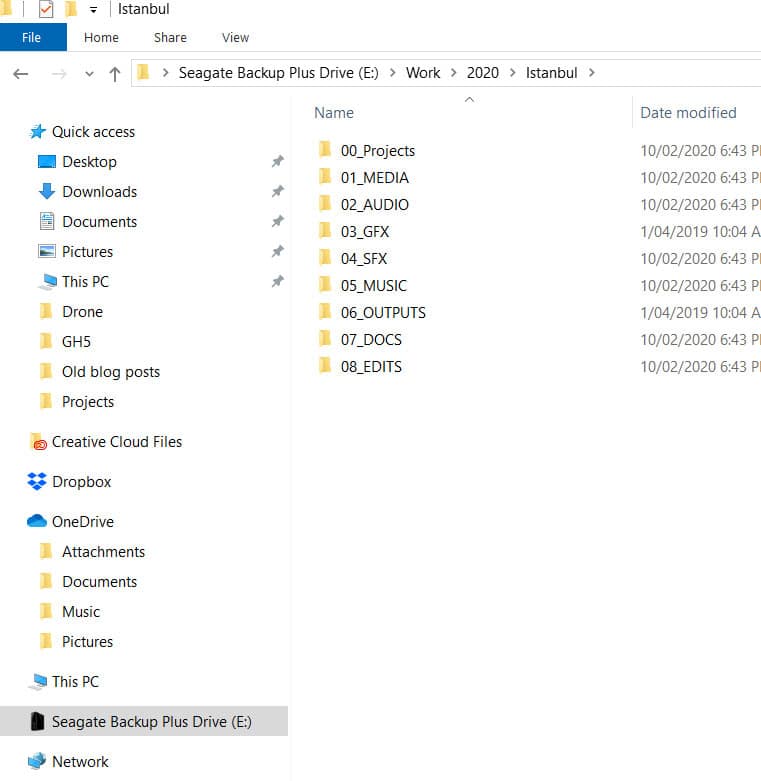
If your media files are scattered across multiple drives or folders, Premiere Pro will have trouble relinking them if anything gets moved or if you open the project on another computer.
Once your folder structure is ready, you’re all set to import your footage.
How to Import Footage
In Premiere Pro, make sure you’ve selected the Editing workspace tab at the top.
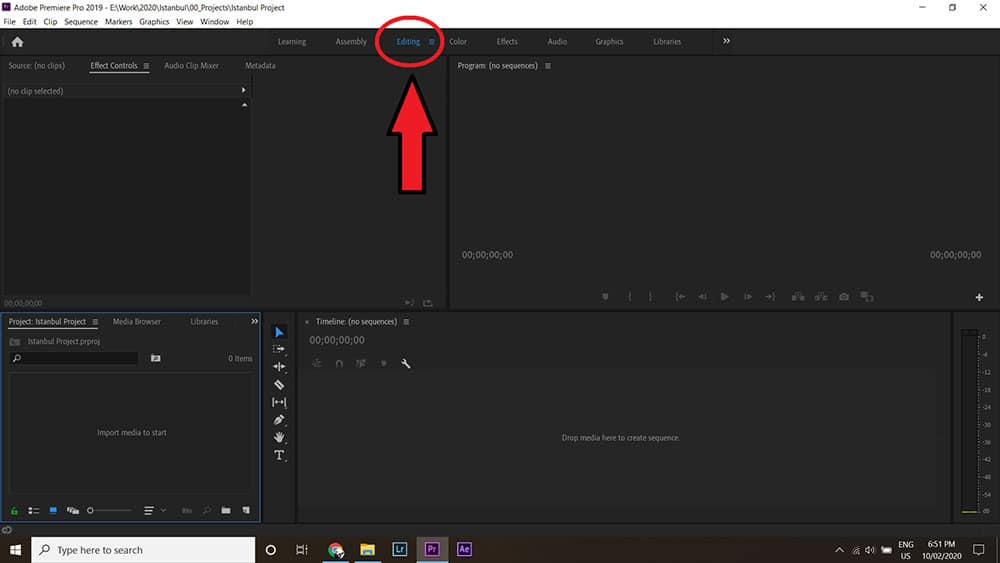
Look at the Project panel in the bottom left of your workspace. This is where you’ll import your footage. You should see the text “Import media to start.” Once you’re ready, you can begin adding your clips.
There are three simple ways to import footage into Premiere Pro (both on Mac and Windows):
1. Double Click
Double-click inside the Project panel. A window will open where you can select the files you want to import.
2. File > Import
Go to the top menu and select File > Import. A new window will open where you can choose your media files.
3. Drag and Drop Footage
Drag your footage directly from its folder into the Project panel. Note that this method can sometimes lag if you’re importing a large number of files at once.
Before importing too much at once, it’s helpful to understand how bins work.
Creating Bins
A bin in Premiere Pro is a folder inside your Project panel. It works just like the folders you use on your computer inside your main media folder.
Create a new bin for each camera or media type, such as GH5, GoPro, Drone, or Music.
Alternatively, you can import your organized folders directly into Premiere Pro, and they’ll automatically appear as bins.
Nice work — you’ve successfully imported and organized your footage using bins. Premiere Pro also provides several additional tools to keep your project tidy.
At the bottom of the Project panel, toggle between Icon View and List View. List View lets you see detailed information about each clip, such as resolution, duration, and file size.
You can also assign colors to your clips to make them easier to find. For example, you could label GH5 clips green, GoPro clips purple, and drone footage red. This makes it simple to tell them apart in your Project panel and on your timeline.
To do this, select your clips, right-click, hover over Label, and choose your preferred color.
And that’s it! You’ve now learned how to import and organize footage in Premiere Pro.

