⭐⭐⭐⭐⭐
Rating: 4.5 out of 5.We give a quick review of CineMatch, looking at ease of use, pricing, settings, and workflow.
Have you ever struggled to match footage from multiple camera sources? Well, CineMatch could be the perfect solution for you.
It uses sensor and color science to match footage from one camera to another easily. Also, it supports a range of common cameras like RED, Arri, Sony, GoPro, and many more.
Get access to all of their plugins with the Bundle License for $149, perfect if you work across more than one editing program. Also, get 10% off CineMatch with our exclusive FilmConvert discount code. 🙌
What is CineMatch?
CineMatch by FilmConvert is a color correction plugin with advanced camera matching features.
The idea is pretty straightforward. Most productions usually have the main camera (Camera A) with other cameras for different angles and cutaways (Camera B, C, etc).
The main goal of CineMatch is to match the look of the other cameras to that of the main camera.
Also, as a plugin, it saves you time and money by working within the editing program you already use. Simply import your footage, place the CineMatch effect onto it, and adjust your settings.
It’s compatible with the most popular editing software on the market, such as Adobe Premiere Pro, Final Cut Pro, and DaVinci Resolve.
The software uses custom camera profiles for over 50 of the most common cameras available.
| Canon | Blackmagic Design | GoPro |
| Nikon | ARRI | DJI |
| Sony | RED Digital Cinema | FujiFilm |
| Panasonic |
So who is it aimed at? CineMatch is perfect for anyone, from first-time editors to professional colorists. It’s a real time-saver.
How Does It Work?

First, each camera has its own color profile. The sensors and the color science behind every camera are different. As a result, two shots from separate cameras can look completely different even if they have the same lighting.
Rebalancing shots is especially tough when mixing multi-cam footage. The uneven grade can distract from the story you’re trying to tell with your shots.
This can be a big problem for any editor and something that can take a lot of time and effort to fix.
So, how does CineMatch solve this? In a nutshell, it works out your camera sensor characteristics and then applies color science to get the most accurate match between colors.
Once you input your camera information, CineMatch automatically readjusts the look of your other shots based on your target camera.
We’ve touched on some of its features, but let’s take a look at what this plugin can do!
Features
CineMatch offers great value for money and has many high-end features. Even better, these features are super easy for both pros and beginners to use.
Let’s round up some of our favorites!
Flexibility
You can use CineMatch to match footage from over 70 different cameras! No matter what you film on, you’ll get a seamless baseline grade from the start.
Fix White Balance

In a perfect world, the camera crew would be expected to maintain a proper white balance. Unfortunately, as we all know, that rarely happens. CineMatch has exposure and white balance controls for quick adjustments.
Single Click Conversion
You can perform a single click Rec. 709 conversion for any log source. It’s never been easier!
It’s Super Compatible
Do you already use FilmConvert Nitrate? Then CineMatch is the ideal companion. The team behind Nitrate designed it, so you can expect the same quality.
Use It in the Edit
The CineMatch plugin is compatible with popular editing software, such as Adobe Premiere Pro, DaVinci Resolve, and Final Cut Pro.
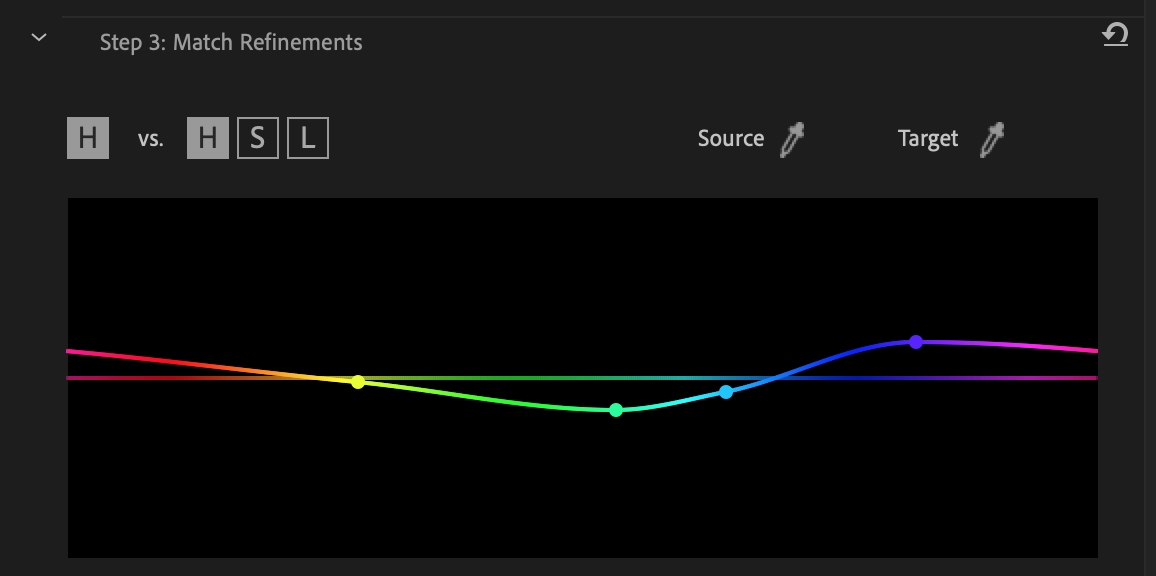
Adjust HSL Curves

Use CineMatch HSL curves to fine-tune the match between source and target clips. There’s also a full range of secondary color settings, including wheels, curves, and levels.
False Color Guides
Use the False Color guides to set exposure and white balance your footage accurately. This is perfect for anyone new to color grading. Get the project started on the right foot!
Gives You Options
CineMatch allows you to work with footage from multiple sources at once. You can use shots from high-end cameras to drones, smartphones, and stock footage without worrying about uneven grades.
This is a real game-changer for editors and DITs! There is no need to slow down your edit workflow.
CineMatch Workflow
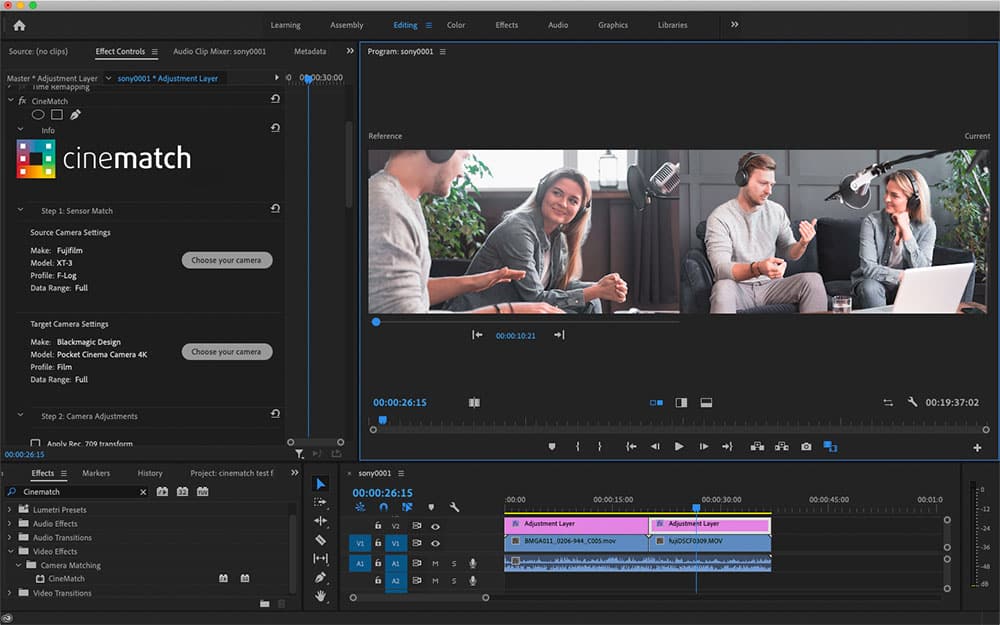
CineMatch is surprisingly easy to use! As a Premiere Pro user, I installed it quickly and got started straight out of the box. Here is a short guide on how to use CineMatch in Premiere Pro.
Step 1: Add Footage To Timeline
Add two clips (or multiple clips) you want to match to your timeline. Leave clips in Log, don’t apply LUTs or make other adjustments.
Step 2: Add CineMatch Effect
Add CineMatch from the Effects menu to both clips.
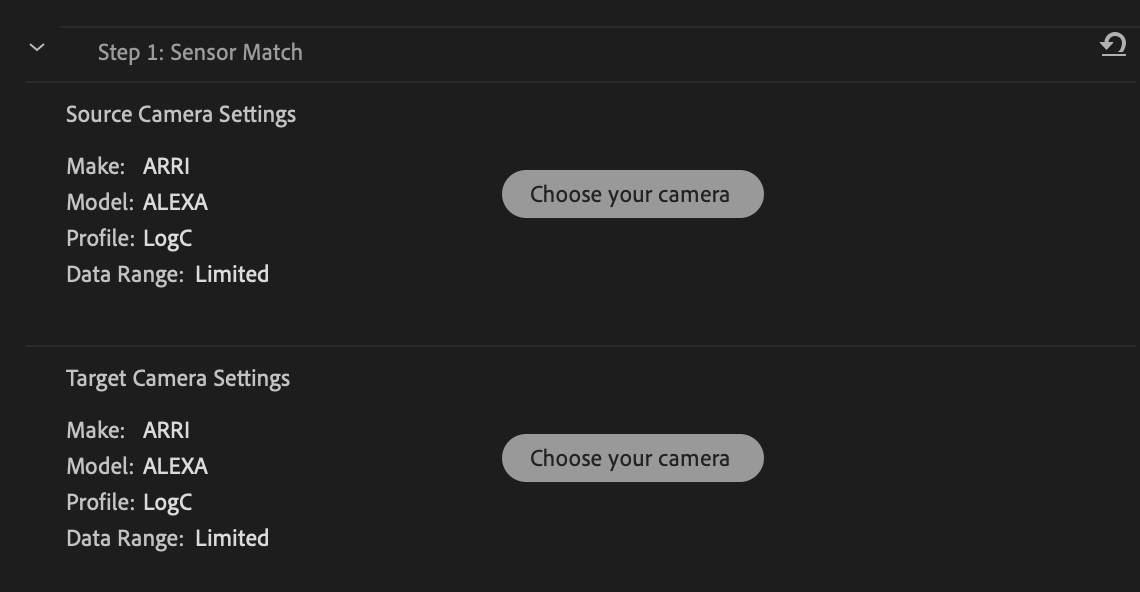
Step 3: Sensor Match

Firstly, choose your source camera settings. Then, select your target camera settings. Do this for both the A-CAM and B-CAM footage. For example, if you are working with both Arri Alexa and GoPro Hero10 footage and you want it all to look like Arri footage, then you need to do this:
For A CAM:
- Set Source Camera Settings to Arri
- Set Target Camera Settings to Arri
For B CAM:
- Set Source Camera Settings to GoPro
- Set Target Camera Setting to Arri
You will see results from this step alone. Feel free to export your footage or edit it.
Want to take it a step further? You can then use steps 2 and 3 to refine the match.
Step 4: Camera Adjust

Next, you can adjust the Exposure, Temperature, and more! You can also apply a Rec. 709 transform from here. This is also where the False Color guides come in handy. Use them to help evaluate your images.
Step 5: Match Refine

Do you need to tweak your footage even further? The HSL tools will correct any differences the sensor match may have missed.
Step 6: Secondary Controls

Lastly, you can manually fine-tune footage even further with secondary tools. Need to generate a 3D LUT? It’s no problem; there is an Export button at the top.
So now we know how it works, it’s time to talk about costs.
Pricing

Firstly, CineMatch keeps its pricing simple. It’s just $99 for DaVinci Resolve, Final Cut Pro, and Adobe Premiere Pro (down from $149). Secondly, if you choose to buy the CineMatch Bundle, you can get it for $149 (which helps if you’re editing across different programs).
However, if you want to take it for a quick test drive, then you can get a free trial.
Is CineMatch Worth It or Not?
In short, yes. CineMatch is definitely worth it if you’re looking to match footage. It’s a handy tool that can save you a lot of time in post-production. It does all of the tricky work so you can focus on telling your story.
However, if you’re looking for more advanced color grading options, it might be worth using something like Davinci Resolve.


