Ever watched a dialogue scene you couldn’t forget? If so, chances are the director knows a thing or two about using shot-reverse shot.
This fundamental film technique may seem like a simple back-and-forth between characters, but there’s so much more that makes it feel real.
When I first attempted to film dialogue scenes, I made many mistakes, and at the time, my scenes were clunky, disorienting, and flat.
Good news, you don’t have to take that route. I’ve taken what I learned from hundreds of projects and created this practical guide.
I’ll explain everything you need to know, from what a shot-reverse shot is, why they’re used, where you’ve seen them, and the stylistic choices that immerse the viewer.
Let’s dig into the details that make certain scenes stand out.
What is a Shot-Reverse Shot?
A shot-reverse shot is a technique to film a dialogue scene between two characters.
It creates the illusion that two characters (filmed separately) are having a continuous conversation. This could take place at dinner, in a car, on the street, in space, literally anywhere.
Why Use Shot-Reverse Shot?
The shot-reverse shot harnesses the emotion of a scene by showing how each character affects the other, through what’s said or not said.
Here are a few quick reasons to use a shot-reverse shot:
- Drive Story
- Continuity
- Action & Reaction
- Establish Relationships
- Character POV
- Show Context
- Generate Meaning
- Transfer Scene Value from Positive to Negative (vice versa)
By showing each side of the shot-reverse shot, the viewer can understand the characters, see the bigger picture, and extract meaning from the interaction.
But it’s not a one-size-fits-all. There are different types for various effects.
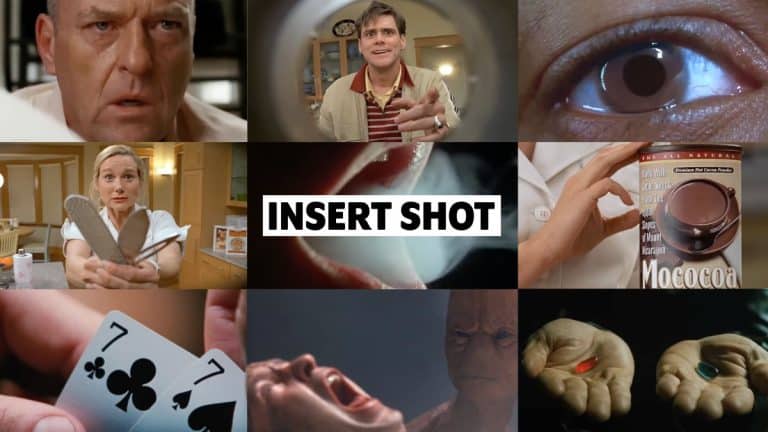
Types of Shot-Reverse Shot
Below, I’ll cover four types of shot-reverse shot. The tone of your scene determines which type you should use.
Over the Shoulder (OTS)
The OTS shot is the most common way to film character dialogue.
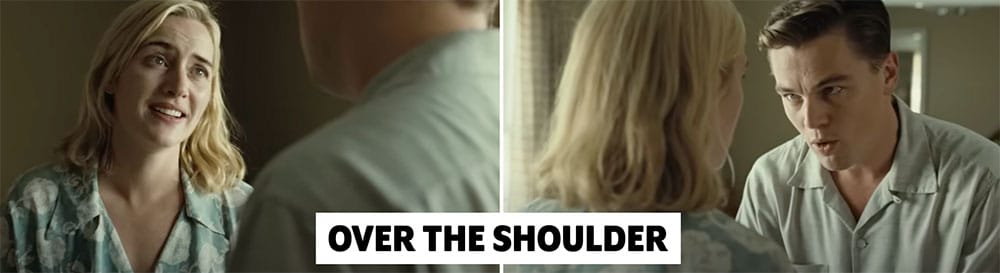
This method gives the impression that the two are speaking in real time. It’s also a visual way to connect characters.
Often, we see the back of Character #2’s head and shoulder to the camera. This is called ‘dirtying’ up the frame, creating a foreground layer.
Singles
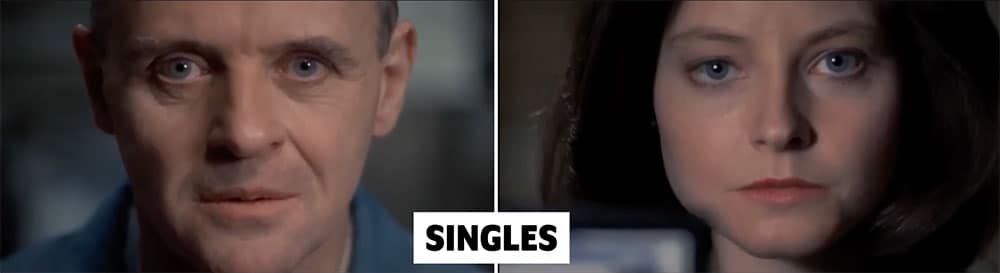
By centering the single subject in the frame, the characters look head-to-head. It’s uncomfortable and feels threatening. This was done with great effect in the dialogue scene between Hannibal Lecter and Agent Clarice Starling in The Silence of the Lambs (1991).
50 / 50
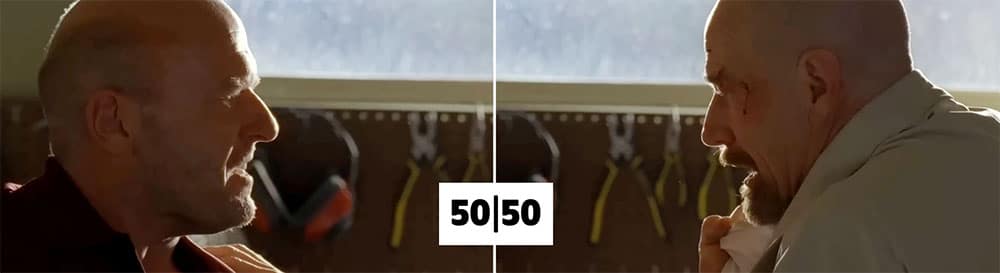
Next is the 50/50 shot. This type of shot is all about confrontation.
When we see the side profile of each character edited together, the characters seem to face off with one another.
French Over
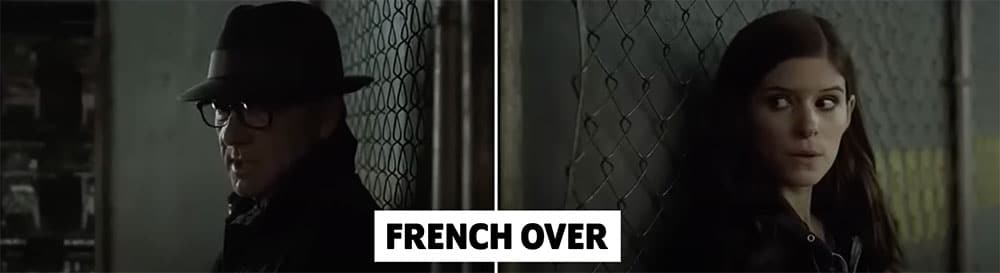
Another type is called the French over, AKA an Over-the-Back shot. This is most useful when two characters are having a conversation in secrecy.
The camera is to the back of the subjects, usually on a park bench or in a public space. Often, the scene is dimly lit, preventing the audience from seeing their expressions fully.
Knowing these shot types helps speed up creative choices. This way, you can free up time to focus on other things like performance and continuity.
Shot-Reverse Shot Examples
To see the potential of this useful technique, check out some of these shot-reverse shot examples below.
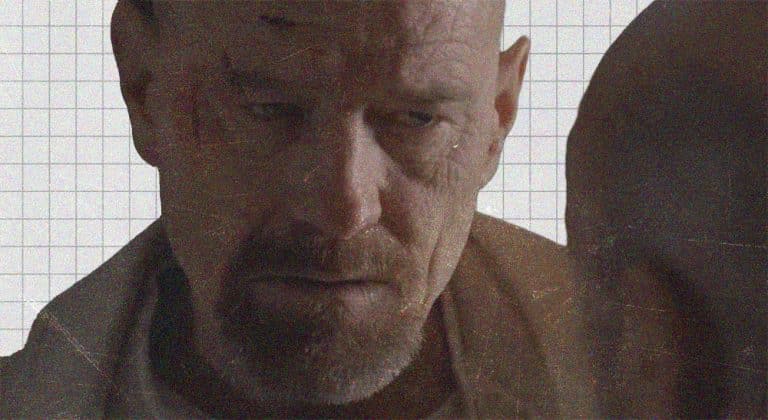
Breaking Bad (2013) “Blood Money”
My favorite example of a masterful shot-reverse shot is Walt and Hank from Breaking Bad (2013). The closing garage door not only traps Walt in an unfavorable situation, but also us, the audience, to witness two titans trade power. This is a textbook example of how shot sizes can match the emotional state of a scene. The result is pure cinematic magic.
The Master (2012)
This scene from The Master (2012) packs a punch. Three intensely placed shots put the audience directly into the interaction between Joaquin Phoenix and Phillip Seymour Hoffman. Phoenix gets grilled with hard-pressing questions, resisting the truth. The pacing of each shot lingers to build tension. From Hoffman anticipating answers to Phoenix wrestling with what he shares. The exchange is palpable.
Revolutionary Road (2008)
In this example from Revolutionary Road (2008), we’re thrown right into a heated exchange using shot-reverse shot. There’s a clear moment where the camera dollies from over the left shoulder of DiCaprio, to his right, setting up the next reverse shot to occupy the new 180° action line. This method disorients the screen direction as they travel from room to room, providing a sense of ‘nowhere to escape’. This scene leads to a hair-raising payoff through an ensemble of strategic blocking and shot-reverse shots.
House of Cards (2013)
This infamous series caught the attention of many for its excellent use of shots. During a secret meeting between Frank Underwood and Zoe Barnes, we see a semi-over-the-back shot. They secretly discuss finalizing their relationship as Frank prepares to end the conversation for good.
Stylistic shot choices affect the emotional power of your dialogue scene. Let’s discuss how you can make your scenes come to life.
How to Film a Better Shot-Reverse Shot
Use the following step-by-step guideline to get the most out of your shot-reverse shot and help enhance your next dialogue scene.
Plan Your Shots
Things can get complicated on set, and the less you have to think about, the better.
It’s okay to wing it sometimes, but by pre-planning, you, your crew, and actors will have more creative energy to focus on the parts you enjoy.
Follow the 180 ° Rule
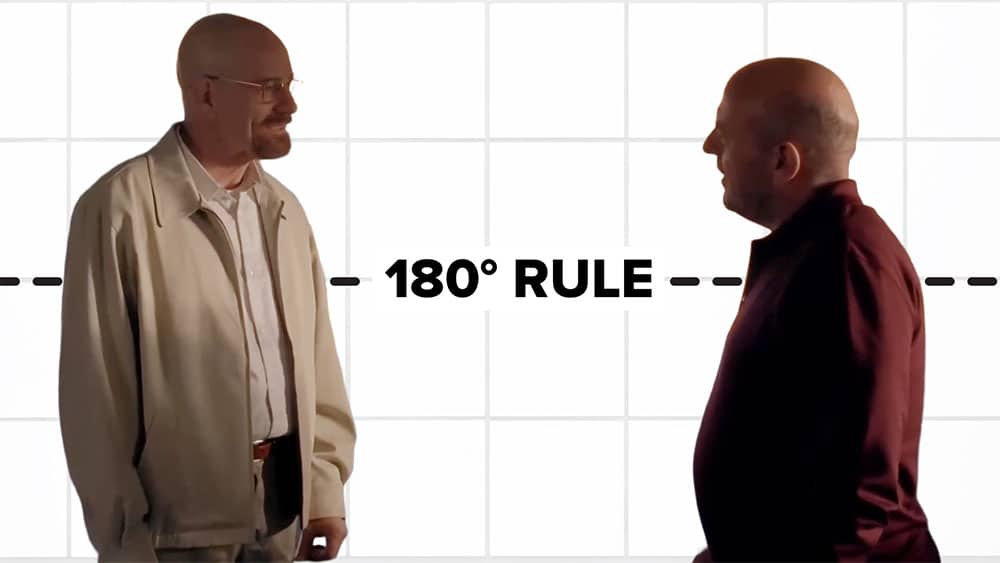
The goal when editing a shot-reverse shot is to make it seem as though the characters are talking to each other in the edit. This is called proper screen direction, and knowing the 180° rule is essential to achieving it.
First, the 180° rule or ‘Line of Action’ is a line drawn between two subjects.
Second, the camera must always be placed on one side of the Line of Action. Otherwise, the characters won’t be looking at each other in the edit.
Choose Eye Line Framing
Consistent eye-line placement is a crucial part of framing dialogue scenes. After all, it orients the viewer and directs the eyes where to look. You don’t want the eyes to shift between shots.
To maintain continuity, use the top horizontal guideline from the rule of thirds between shots. The same goes for shot sizes: Close-Up, Medium, and Long shots.
Remember, disorientation leads to disengagement. Shifting the eye line takes the viewer out of the scene rather than drawing them in.
Film Reaction Shots
Oftentimes, how characters react is more powerful than the dialogue itself. In fact, a reaction shot can change the context of the statement made before it.
During a key moment in your scene, film several reaction shots. It’s nice to have a good selection to play with in post. You don’t have to go full soap opera; micro expressions will sell the emotion.
Select Your Shot Size
A rhythmic choice of shot sizes will carry the viewer through a wave of emotions.
For example, when the dialogue exchange gets intense, cut to a close-up. Then, when the tension breaks, cut back to a medium or wide shot.
| SHOT SIZE | EFFECT |
|---|---|
| WIDE | Orient Audience, Relieve Tension |
| MEDIUM | Establish Connection |
| CLOSE UP | Show Emotion, Sympathize |
Set Your Focal Length
There are ways to change the appearance of characters and how viewers connect with them.
One way is to film your subjects at a distance with a telephoto lens, and second, film close with a wide lens.
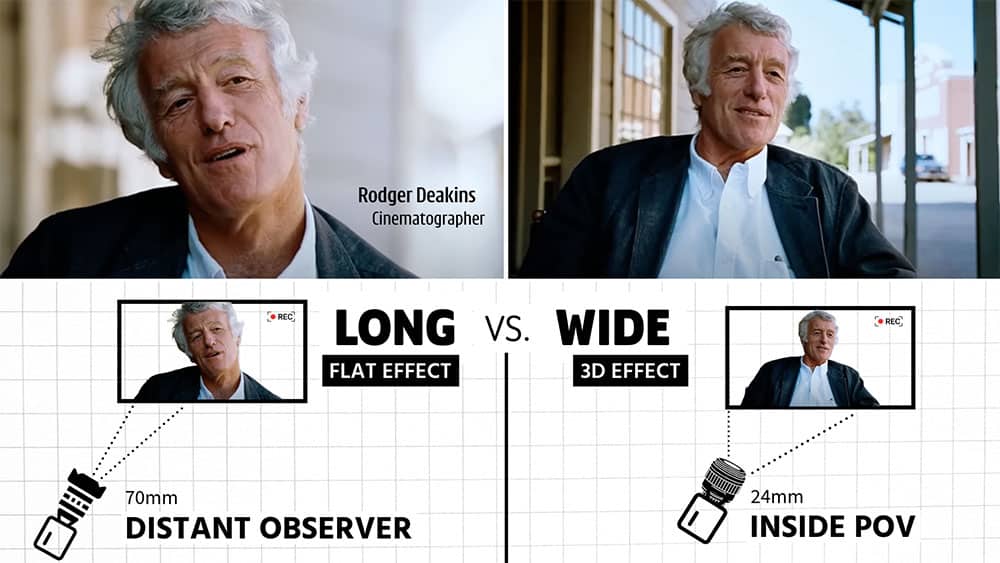
Flat Look vs. 3D Look
| FOCAL LENGTH | USE | EFFECT |
|---|---|---|
| Telephoto Lens (70mm) | Distant Observer | Compressed Flat image |
| Wide Lens (24mm) | Intimate POV | 3D characteristics, viewer inside the conversation |
Telephoto: Flat Look
Using a telephoto lens for a dialogue scene compresses the space between characters. This approach creates a flat image, making the subjects appear closer to each other.
By positioning the camera away from the subject, you get the perspective of a distant observer.
Wide Lens: 3D Look
Conversely, when the camera is placed right in front of the subject with a wide lens, the shot feels 3D and personal to the subject. This is the preferred method by the great DP, Rodger Deakins.
To harness the scene’s potential, storyboard it out and write in shot sizes to use at every tone shift in the dialogue. It will pay off.
Record Audio Separately
To have complete freedom while editing your dialogue scenes, be sure to record your subjects separately.
First, have one character read all their lines alone. Then, the next character reads. This way, you’re free to tighten or loosen your dialogue overlap as you wish. Otherwise, if your audio is stepped on by the other subject, you’re out of luck.
Also, with over-the-shoulder shots (OTS), avoid filming the mouth of the character being spoken to. This gives you full freedom to use those takes.
Write Good Dialogue
The goal is to have your dialogue sound natural and rhythmic. Consider real life, how people cut each other off and react. Seek out that rhythmic pop in your dialogue. This makes it feel natural and adds to the realism.
Also, be curious about where the actor’s instincts take them. Be open to discovery. After all, we’re looking for that spark, and if it comes, be ready to capture it!
Pay Attention to Lighting
Last but not least, lighting. It’s very important, as it sets the tone of the scene.
If the scene is positive and open, use high-key lighting. If the story is dramatic, use low-key lighting.
Wrapping Up
As you can see, this type of shot has a lot of nuances and can create different effects based on the smallest details.
One way to get in the habit of visualizing dialogue is to pay attention to interactions in your everyday life. When talking to someone, actively zoom out and witness yourself with that person. Think about what the exchange is really about and what shots you would choose to express what’s happening.
There’s no better way to master your craft than to get out there and practice.