In our first tutorial, we covered how to import footage. So, what comes next? Since Premiere Pro is an editing program, it’s time to start editing!
Editing footage can feel intimidating if you’re just getting started. In this tutorial, we’ll guide you through the basics of adding clips to the timeline, then show you how to cut and edit them.
Source Monitor
First, with Premiere Pro open, make sure you’re in the Editing workspace. This layout is best for cutting and assembling footage.

In this workspace, above your Project panel on the left, you’ll see the Source Monitor.
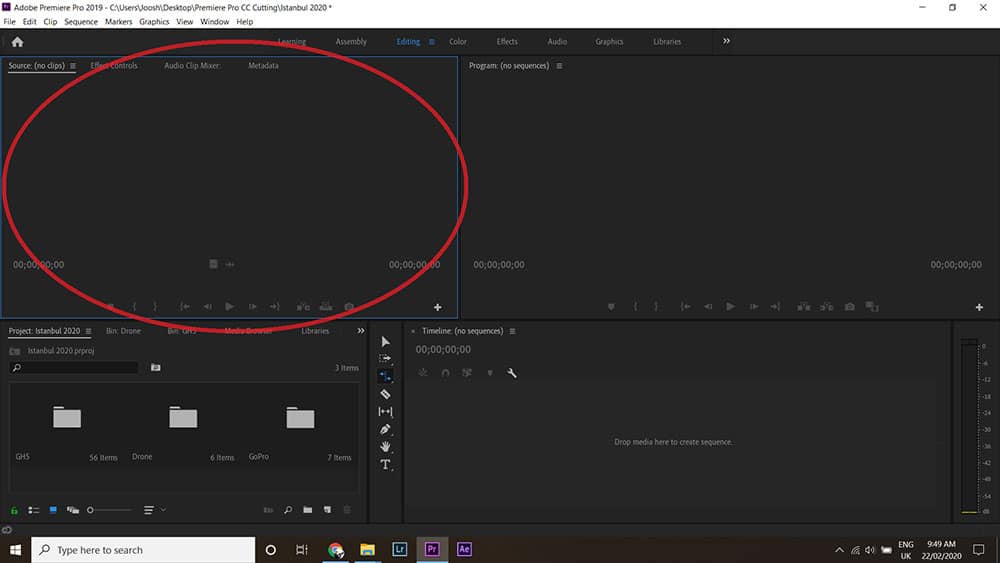
The Source Monitor lets you preview your footage. To open a clip, find it in your Project bin and double-click it.
If playback feels choppy, you can lower the resolution for smoother performance. Try setting playback to 1/4 for a lighter load on your computer.
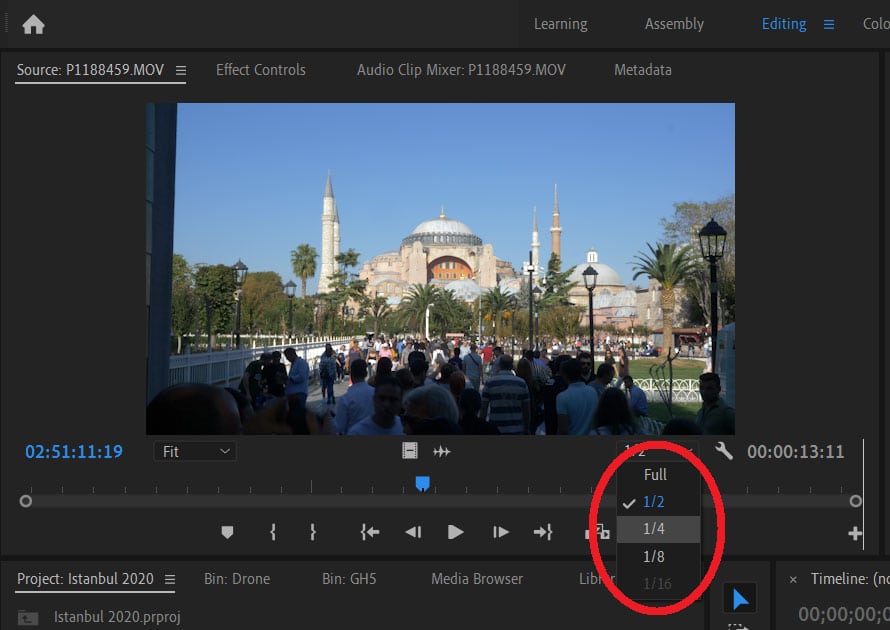
While your clip is playing, scrub through it and decide which part you want to use in your edit.
Press I on your keyboard to set the In Point. This marks where your clip will start in the timeline.
Press O to set the Out Point. This marks where your clip will end. (Think “I” for in, “O” for out.)
Now, click the footage in the Source Monitor and drag it into the Timeline panel on the bottom right.
And that’s it! You’ve just added your first clip to the sequence. Now you’re ready to start editing.
Sequence Settings
Before editing, you may want to rename your timeline or adjust your sequence settings.
To rename the sequence, find it in your Project bin and double-click the name.
To change sequence settings, go to Sequence > Sequence Settings. Here, you can adjust details like frame rate and resolution.

Program Monitor
When you add a clip to the timeline, it appears in the top-right corner of the workspace — that’s the Program Monitor.

It may feel strange to see both the Source Monitor and Program Monitor side by side, but they serve different purposes.
The Source Monitor (left) shows your raw footage from start to finish.
The Program Monitor (right) shows your edited timeline — it’s your live preview of what the finished video will look like.
Adding More Footage
To build your edit, keep adding clips individually using the same process: choose your In and Out points in the Source Monitor, then drag to the Timeline.
As you add clips, you’ll notice they “snap” into place next to existing ones. This is called Snap — it helps keep your edit tight and aligned.
If clips aren’t snapping, make sure the magnet icon on the Timeline is blue (active). You can toggle it on and off by pressing S.
If you see gaps between clips and want to close them, right-click and select Ripple Delete.
Editing Footage
Now it’s time to start editing your footage.
Even after setting In and Out points, you may want to refine your clips on the Timeline. You can trim, move, or cut them to fine-tune your edit.
One way to trim is by dragging the ends of each clip to shorten or extend them — but there are faster tools for this.
Look to the left of your Timeline — you’ll see a set of tools. Don’t worry, they’re easier to use than they look!
Tools
The first one is the Razor Tool, which cuts clips. Press C to select it.
Click anywhere on a clip to split it into two. To remove a section, press V to switch back to the Selection Tool, click the unwanted part, and press Delete.
You can also use shortcuts: press Q to cut and delete everything before the playhead, or W to cut and delete everything after it.
Next is the Track Select Forward Tool. Press A to select it — this lets you move everything on the Timeline from a certain point onward.
To move everything to the left instead, hold Shift and press A.
The Rolling Edit Tool (press N) adjusts two clips at once, extending one while shortening the other — great for tightening cuts without gaps.
The Rate Stretch Tool (press R) changes the speed of a clip. Drag the edge inward to make it faster or outward to slow it down.
The Slip Tool (press Y) lets you change a clip’s In and Out points without moving it on the Timeline. Just click and drag while watching the Program Monitor for feedback.
Other Keyboard Shortcuts
Here are a few more useful keyboard shortcuts that can speed up your workflow.
With a clip selected, press F to open that media in the Source Monitor — great for quickly revisiting and adjusting In and Out points.
Hold Alt (or Command on Mac) and use the arrow keys to move a clip on the Timeline. Hold Shift for larger movements.
Finally — and most importantly — press Ctrl + S (or Command + S on Mac) to save your project. Make saving a habit to protect your hard work. 👍